

Hat shaping is where a western wear store or hat shop earns its reputation. Customers walk in with a crushed brim, a flattened crown, or a brand-new blank that needs a cattleman crease before they’ll buy it. The technique itself is simple: apply steam to make the felt or straw pliable, mold it into the desired shape, and let it set. What separates a professional operation from a hobbyist with a tea kettle is equipment, consistency, and throughput. A shop that can shape 15 to 20 hats a day with uniform results is running a different operation than someone fixing one hat in their kitchen.
How to Shape a Hat with a Steamer: Quick Summary Apply commercial-grade steam (40+ PSI) for 3 to 5 seconds until the felt or straw becomes soft and workable. Shape the crown and brim by hand or using hat blocks and shaping heads. Allow the hat to cure for 24 hours on a hat stand or form to lock the shape. Consistent, high-pressure steam from a commercial boiler delivers repeatable results across every hat, every time.
This guide covers professional hat-shaping technique, the equipment decisions that affect daily workflow, and how to choose the right commercial steamer setup for your shop’s volume and service mix.
Setting Up Your Workshop for Production
Hat shaping in a retail or workshop environment demands more than a clear counter. You’re shaping hats in front of customers, running multiple jobs in a day, and working around inventory. A well-organized station makes the difference between smooth throughput and constant fumbling.
Dedicated Shaping Station
Establish a fixed station with your steamer, shaping heads, and finishing tools within arm’s reach. Many hat shops position the shaping station in view of the sales floor so customers can watch the process, which builds trust and justifies the service fee. Keep the surface clean and dry between jobs. A towel rack or hook system nearby lets you wipe condensation quickly without breaking workflow.
Lighting is critical for professional results. Overhead light alone casts shadows that hide lopsided creases and uneven brim curves. Task lighting from multiple angles (a swing-arm lamp is ideal) lets you spot asymmetry before the hat cures and the customer walks out.
Ventilation and Shop Comfort
A commercial steamer running several hours a day adds significant moisture and heat to a workspace. Without proper airflow, humidity accumulates, slowing cure times and making the shop uncomfortable for staff and customers. Install exhaust ventilation at the shaping station, or at minimum run a dedicated fan. Shops in humid climates (Texas, the Gulf Coast) report that a small dehumidifier near the curing area noticeably improves set times and shape retention.
Safety and Compliance
Steam burns are a real workplace hazard. At 40 to 90 PSI, commercial steam equipment demands respect. Every operator should understand safe distances, proper foot pedal technique, and emergency shutoff procedures. Thin cotton gloves protect hands while preserving the dexterity needed for fine shaping work.
If your shop operates in a jurisdiction that requires boiler permits or pressure vessel documentation, ASME and UL certification on your equipment isn’t optional. Hoffman Pro Line models (ELG4, JEL3, JEL11) carry both certifications, which simplifies compliance and inspection paperwork. Running uncertified pressure equipment in a commercial setting is a liability risk that no shop should take.
Choosing Commercial Steam Equipment
The steam source is the backbone of a hat-shaping operation. The choice comes down to your shop’s daily volume, the types of hats you work on, and whether hat shaping is your primary service or one offering among many.
Why Consumer Equipment Falls Short in a Shop Setting
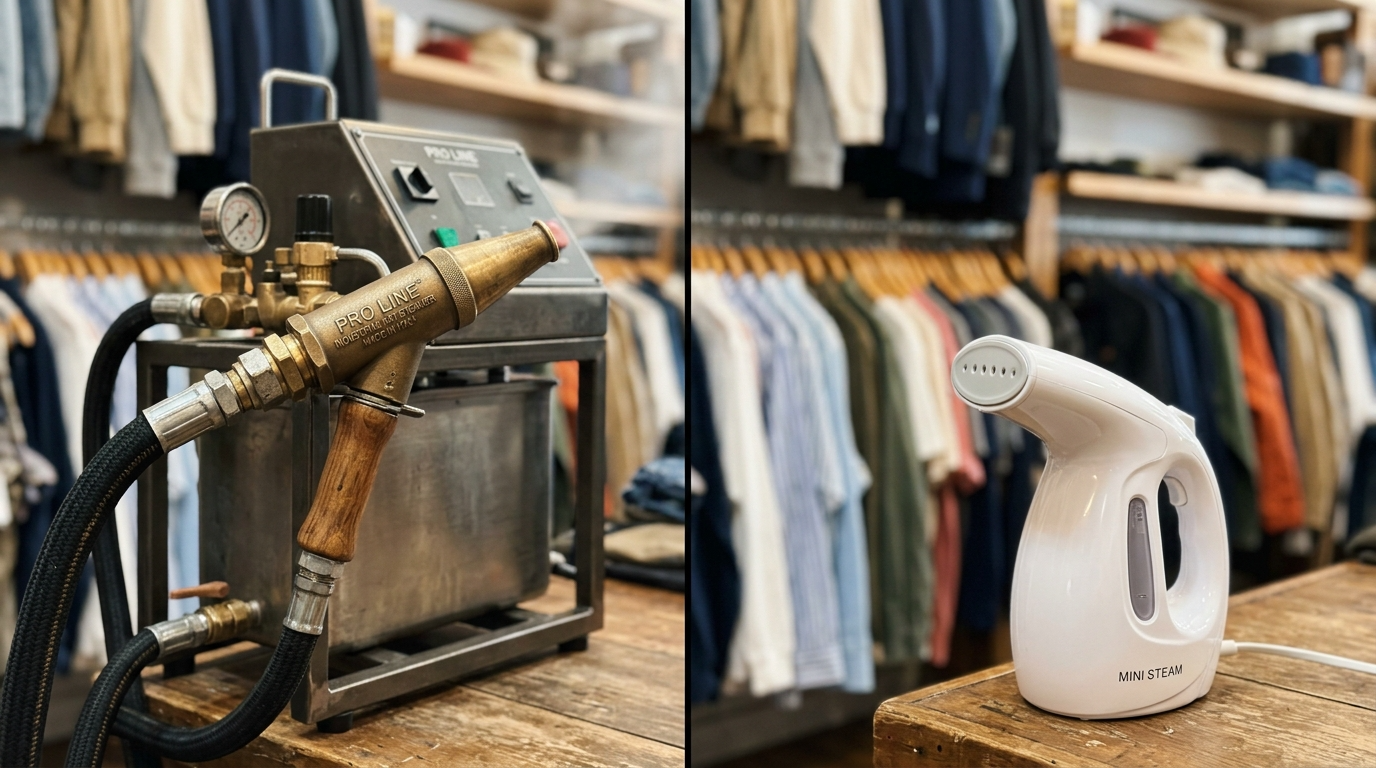
Your customers may try reshaping hats at home with tea kettles or $40 handheld garment steamers. Some of them will get acceptable results on a single hat. But these methods fail in a shop environment for three reasons: inconsistent steam output, no hands-free operation, and zero duty cycle for back-to-back jobs. A consumer garment steamer takes 30 to 60 seconds to soften thick felt, and most need refilling every 15 to 20 minutes. That’s unworkable when you have six hats lined up before lunch.
Practitioners on Reddit’s western wear communities frequently describe upgrading from a kettle to a commercial steamer and cutting their reshaping time in half while getting noticeably cleaner creases. One user in r/cowboyboots noted that a standard stovetop kettle was fine for a single hat at home, calling it “the cheapest hat tool you already own,” but the same user acknowledged it’s a different story when you’re running a business.
Commercial Steamers Built for Hat Work
Commercial hat steamers produce higher-pressure, drier steam that penetrates dense felt in seconds rather than minutes. Foot pedal control frees both hands for shaping, which is essential for precise crown work. And continuous-duty operation means you can move from one hat to the next without waiting for the unit to recover.
Hoffman Steam builds several models suited to hat shop operations, each scaled to different volumes:
| Model | Price Range | Capacity / Power | Certification | Best For |
|---|---|---|---|---|
| GEM-III (Portable Flash) | $995 | Non-pressurized, foot pedal | No boiler permit required | Mall/retail locations, light volume |
| EVD-1 Everyday | $1,199 | 1-gallon, 110V, 40 PSI | — | Small shops, 5–10 hats/day |
| ELG4 / JEL3 (Pro Line) | $1,899–$2,599 | 1.5–3kW, 110V or 220V options | ASME / UL | Dedicated hat shops, 10–20+ hats/day |
| JEL11 Series (Large Capacity) | $4,495–$7,895 | 6-gallon, 220V, auto pump option | ASME / UL | High-volume operations, continuous duty |
Hat Shop Bundles: Operational From Day One
Hoffman offers hat shop bundles priced from $2,149 to $4,895 that include the boiler, steam wand, hat shaping heads, and accessories. These bundles eliminate the guesswork of assembling components separately. A new shop can be shaping hats the day the equipment arrives, without additional integration work or third-party accessories.
For shops watching cash flow, Hoffman provides financing options including 0% APR promotions, plus a 30-day return policy that effectively functions as a no-risk trial period.
What NOT to Use in a Professional Setting
- Tea kettles and consumer steamers: Fine for a customer at home. Unprofessional and impractical for shop use, with no duty cycle, no hands-free operation, and inconsistent output.
- Hair dryers or heat guns: Dry heat dehydrates natural fibers and causes cracking. Never appropriate for hat work.
- Steam irons pressed against the hat: The hot metal plate scorches, melts, or leaves shiny marks on felt. If an iron is used at all, hold it several inches away and use only the steam function.
Identifying Hat Materials Before You Start
This is the step that separates skilled hat shops from careless ones. Customers bring in everything from $500 beaver felt Stetsons to $30 polyester fashion hats. Treating them the same way destroys hats and reputations. Train every operator to identify materials before touching steam to felt.
The Pinch and Burn Tests
You can usually tell what a hat is made of by touch and experience. Fur felt (beaver, rabbit, or a blend) has a smooth, dense surface with fine fibers that feel almost silky. Wool felt is coarser, with a slightly fuzzy texture and visible fiber structure. When in doubt, snip a tiny fiber from an interior seam and hold it near a lighter flame. Animal fibers (fur and wool) smell like burning hair and leave a crushable ash. Synthetic fibers melt into a hard plastic bead.
One hat maker on YouTube demonstrated the pinch test by comparing a $20 wool hat to a $300 beaver felt. The beaver felt bounced back to shape instantly after being pinched, while the wool held the dent. That resilience directly translates to how well the material will hold a steam-shaped crease, and it’s the kind of knowledge your staff should have instinctively.
Quick Material Reference
- Fur Felt (Beaver/Rabbit): Dense and smooth. Highly responsive to steam. Holds shapes better than any other hat material. Can handle more steam exposure without damage. Your bread and butter for custom shaping work.
- Wool Felt: Slightly fuzzy, visible fiber grain. Responds well to steam but shrinks easily if overworked. Use short bursts and warn customers about limitations on heavily reshaped wool hats.
- Straw (Panama, Shantung, others): Woven or braided fibers. Needs gentle, lower-pressure steam with minimal moisture. Too much steam causes cracking or waffle-like distortion in the weave.
- Synthetic Felt and Polyester Blends: Common in inexpensive fashion hats. Low melting point. Keep much greater distance from the steam source and use shorter bursts. Results won’t be as crisp or long-lasting. Set customer expectations accordingly, and consider whether it’s worth your time to reshape a hat that won’t hold its shape well.
For more detail on adjusting steam approach for different materials, see this guide on steam settings for felt vs straw.
Always Test on a Hidden Area First
Before reshaping a customer’s hat, test steam response on a spot that won’t be visible: the inside of the crown near the sweatband, or the underside of the brim near the back. Apply a brief burst of steam (2 to 3 seconds) and check for color change, water spotting, shrinkage, or fiber damage. This is especially important for vintage hats where the felt may have degraded with age, or any hat where you’re not certain of the material composition. A quick test beats an expensive claim.
How to Shape a Hat with Steam: Step by Step
With commercial equipment running and the material identified, here’s the professional technique. This workflow assumes a foot-pedal-operated commercial steamer with a steam wand or nozzle.
Step 1: Get Consistent Steam Flowing
Allow your boiler to reach full operating pressure before starting. On a Hoffman EVD-1, this takes roughly 8 to 10 minutes from cold. Pro Line and large-capacity models may take slightly longer but maintain pressure continuously through a full day of work. You want a steady, dry flow, not sputtering bursts of water. Sputtering indicates low pressure, mineral buildup, or a maintenance issue.
If your steamer seems weak or inconsistent, a low steam pressure troubleshooting checklist can help diagnose common problems before they cost you a day’s work.
Step 2: Apply Steam to the Hat
- Maintain proper distance: Hold the hat 6 to 8 inches from the steam nozzle. This prevents oversaturation from condensation and protects the operator from burns.
- Keep the hat moving: Rotate it slowly and continuously through the steam. The goal is to heat the target area (crown, brim, or a specific crease) evenly until the entire section is uniformly soft.
- Work in bursts: With commercial steam at 40+ PSI, 3 to 5 seconds is usually sufficient for felt. Check pliability. You want it warm and workable, not wet.
Step 3: Check for Pliability
The material should feel soft and flexible under light finger pressure. A felt crown should give easily when you push on it. A straw brim should flex without cracking or resistance. If it’s still stiff, apply more steam. If it feels soggy or wet to the touch, you’ve gone too far. Let it dry slightly before continuing. With commercial equipment producing drier steam, oversaturation is less common than with consumer methods, but it still happens with operators who are new to the equipment.
Step 4: Shape the Crown
Work from the inside out. Place one hand inside the crown and push outward to smooth dents, remove storage creases, or establish a clean dome shape before adding creases from the outside. Hat shaping heads (included in Hoffman hat shop bundles) provide a consistent form for this step, which matters when you’re creating the same crease style on multiple hats throughout the day.
Practitioners in western wear forums frequently point out that beginners make the mistake of only pressing on the outside of the crown. This leads to lopsided pinches and uneven walls. Starting from the inside gives a clean foundation to build on, and it’s the technique experienced hatters use.
For a pinch front (fedora style): Push the crown into a smooth dome first. Then create the front pinch by pressing inward from both sides simultaneously with your thumbs.
For a cattleman crease (classic western): Form the center channel by pressing down from the top of the crown while supporting the side walls from inside with your other hand. A hat shaping head makes this significantly easier and more repeatable.
Step 5: Shape the Brim Section by Section
Don’t steam the entire brim at once. Work in sections, roughly quarters or thirds around the brim.
This matters because felt cools and re-stiffens quickly. If you steam the whole brim, the first area will already be setting before you get to shape the last area, producing uneven curves. Practitioners on Reddit report that sectional steaming, combined with constant checking against a flat surface, produces the most consistent brim rolls. For shops doing this all day, consistency across hats is what builds a reputation.
For a flat brim: Steam one section, press it flat on your work surface, hold for 10 to 15 seconds, then move to the next section. Overlap the steamed areas slightly to avoid hard transition lines.
For a curved or “snapped” brim: Steam one section, then curl it upward by hand or press it against a rounded form. Hold the curve until the material starts to cool and firm up. Move to the next section and repeat, checking symmetry from the front and back.
For an asymmetrical shape (rancher style): One side curves up while the other stays flat or dips. Work each side independently with different amounts of curve pressure. This is where operator skill shows, and why customers pay for professional shaping rather than attempting it at home.
Step 6: Let the Hat Cure
After shaping, the hat needs to cool and dry completely so the fibers lock into their new position. In a shop environment, have a designated curing area with hat stands or forms. This keeps shaped hats out of the work area and prevents accidental handling before they’ve set.
Stuff the crown with crumpled tissue paper (acid-free is ideal for customer hats) to maintain the shape and prevent the crown from sagging or developing flat spots. Pack loosely, just enough to support without stretching. Avoid newspaper, as the ink transfers to light-colored felt.
Allow at least 24 hours of curing in a spot with decent airflow. Place the hat brim-down on a hat stand, or upside-down on its crown on a flat surface. If your shop offers same-day shaping service, communicate to customers that the hat should be handled gently for the first day. Many shops schedule next-day pickup as their standard, which protects both the work and the customer relationship.
Step 7: Final Finishing
Once the hat is fully dry, brush the felt with a soft-bristle horsehair brush to restore the nap. Brush in a consistent direction (counterclockwise is standard for most styles). This finishing step is visible quality that customers notice.
If the shape isn’t quite right after the first pass, the process can be repeated. Severely damaged or badly misshapen hats often need two or three steaming sessions. Price your services accordingly for restoration work versus simple reshaping.
Handling Different Materials in a Shop Setting
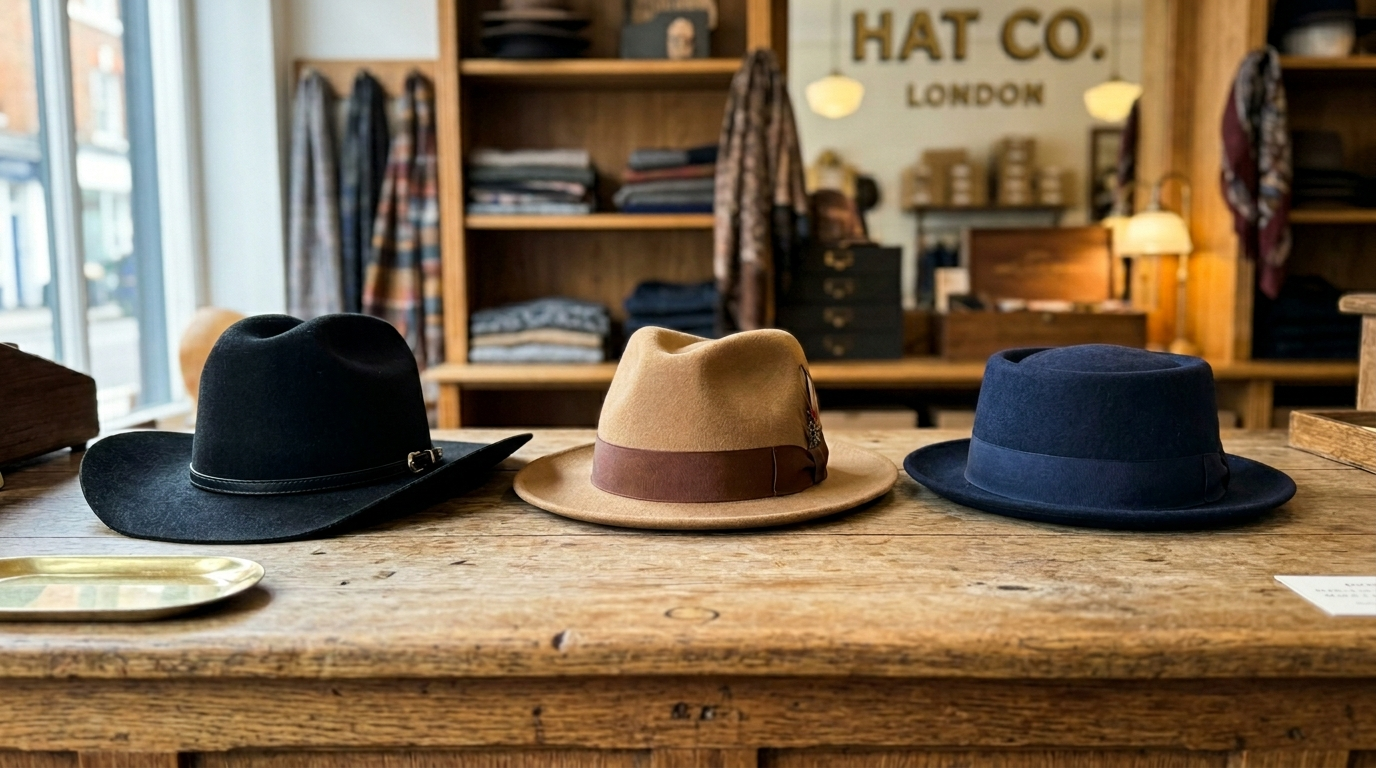
A hat shop sees every material imaginable. Staff should know how each one responds without hesitating.
Fur and Wool Felt
Natural felt is the most forgiving material to steam. Fur felt (beaver, rabbit, mink blends) can be reshaped repeatedly over the life of the hat without significant degradation, which is one reason high-quality fur felt hats justify premium pricing and premium shaping fees. Wool felt reshapes well too, but has a shorter lifespan of repeated steaming before fibers start to break down.
The biggest risk with wool is shrinkage. According to textile research from North Carolina State University’s Wilson College of Textiles, wool fibers can shrink up to 30% when exposed to excessive heat and moisture combined with agitation. For shop operators, that means keep steam bursts short and don’t rub or press wet wool felt aggressively. If a customer brings in a wool hat for heavy reshaping, set expectations about what’s possible.
Synthetics and Polyester Blends
Budget hats from mass retailers are often synthetic. They look like felt but behave very differently under steam. Polyester melts at around 250°C (480°F), and concentrated commercial steam can approach those temperatures at close range.
Rules for synthetic materials in the shop:
- Increase distance to 10 to 12 inches from the steam source
- Use shorter steam bursts (1 to 2 seconds)
- Always test on a hidden area
- Set customer expectations: synthetic materials won’t hold a crease as sharply or permanently as natural felt
- Consider whether reshaping a $30 synthetic hat is worth your shop’s time and liability
Leather, Suede, and Velvet Trim
Many hats have leather sweatbands, suede accents, or decorative trim that don’t respond well to steam.
Leather and suede: Don’t steam them. Moisture causes discoloration, water staining, and stiffening. Cover leather and suede areas with a dry towel or small piece of aluminum foil as a steam shield before working on the felt or straw portions.
Velvet: Can be steamed, but only from the reverse side. Direct steam on the face of velvet crushes the pile permanently. Hold the velvet portion so steam passes through from behind, then brush the pile with a soft brush while still warm.
Common Hat Shapes Your Shop Should Master
- The Cattleman: The standard western crease with a center fold running front-to-back and two side tucks. The most common request in any western wear store, and the shape new operators should learn first.
- The Pinch Front: Found on fedoras. Creates a sharp V at the front of the crown with a center dent running back. Growing in popularity outside traditional western wear.
- The Telescope: A flat, low crown with a slight dip, typical of pork pie hats. Less common but straightforward once mastered.
- Curved/Snapped Brim: Bending the front of the brim downward (snapping) while leaving the back flat or slightly curved up. Popular across fedoras and western hats.
For more on traditional shaping methods compared to steam, see this breakdown of hat steamer vs traditional blocks.
Mistakes That Cost Shops Time and Money
Oversaturation
The most common operator error. Applying too much steam makes the material sodden, causing felt to shrink or lose its internal stiffness. Train staff to work in 3 to 5 second bursts, check pliability, and stop as soon as the material is soft. Commercial equipment with drier steam output reduces this risk, but doesn’t eliminate it.
Using the Wrong Equipment
Some shops try to save money by using consumer garment steamers or improvised setups. The result is inconsistent work, slower throughput, and frustrated operators. Commercial steamers pay for themselves in time savings and quality consistency. A shop shaping 10 hats a day at $15 to $25 per hat recoups the cost of a Hoffman EVD-1 ($1,199) within a few weeks.
Rushing the Cure
Handing a hat back to a customer before it’s fully set undoes the work and damages the shop’s credibility. The 24-hour curing period is when the fibers actually lock in. If you speed things up with a fan blowing directly on the hat, the outside dries faster than the inside, creating warping. Build next-day pickup into your service model.
Skipping Material Identification
Treating every hat the same is how shops end up paying for a customer’s $300 Stetson. A $300 beaver felt and a $30 polyester fashion hat need completely different approaches. Make material identification part of your intake process, and document it.
Equipment Maintenance and Uptime
A steamer that’s down for maintenance is a steamer that isn’t generating revenue. Mineral buildup is the most common cause of reduced steam pressure and inconsistent output. Descaling on a regular schedule (frequency depends on your local water hardness) keeps performance consistent.
Hoffman Steam positions itself as a “steam uptime partner” rather than just an equipment supplier. Their Workhorse Protection Programs are worth evaluating for any shop that depends on steam daily:
- Workhorse Lite ($19/month): Automatic consumable shipments, VIP technical support, compliance documentation, 20% parts discount, and a loaner unit available after 12 months.
- Workhorse Essential ($26/month): Everything in Lite plus full factory reconditioning every 24 months, a 47-point inspection, parts and labor coverage, ASME/UL recertification, and an immediate hot-swap loaner so your shop never misses a day.
All Hoffman equipment comes with a 3-year tank warranty, 1-year component warranty, and unlimited lifetime remote technical support. One user on Reddit’s r/jewelers reported running two Hoffman steamers over 30 years, with the first lasting 24 years. That kind of service life changes the ROI calculation entirely.
For shops looking at certified equipment, Hoffman’s ASME/UL documentation also simplifies insurance and inspection requirements, which is a compliance detail that matters in commercial settings.
Choosing the Right Setup for Your Shop
The right steamer depends on your volume, your space, and whether hat shaping is your primary service or one offering among many.
Western wear store adding hat shaping as a service: The EVD-1 Everyday at $1,199 or a hat shop bundle starting at $2,149 provides everything needed to start shaping hats immediately. The EVD-1 runs on standard 110V power, so there’s no electrical work required.
Dedicated hat shop with steady daily volume: The Pro Line JEL3 or JEL3S ($1,999 to $2,599) with hat shaping heads and accessories delivers the pressure and duty cycle needed for 10 to 20+ hats per day. The 220V/3kW upgrade option is worth considering for faster recovery between hats.
High-volume custom hat operation: The JEL11 series ($4,495 to $7,895) provides 6-gallon capacity and optional automatic pump-fill systems for continuous operation without manual refilling.
Budget-conscious new shop: Hoffman’s Refurbished JEL3 Workhorse Bundle at $999 includes a factory-remanufactured unit with a 1-year warranty and 2-year Workhorse Essential plan. It’s the lowest entry point for commercial-grade hat shaping equipment.
For a detailed comparison of commercial vs consumer steamers and what the differences mean for daily shop operations, that guide is worth reading.
Hoffman offers free shipping within the contiguous U.S., transparent pricing on their website (no quote requests required), and virtual demos on request. Their 30-day return policy means you can evaluate the equipment in your actual shop environment before committing.
Frequently Asked Questions
How long does it take to steam and reshape a hat with commercial equipment?
With a commercial steamer at 40+ PSI, active shaping time is typically 2 to 5 minutes per hat. The longest part of the process is the 24-hour curing period. A shop with proper workflow can shape 15 to 20 hats in a working day, with curing happening overnight.
What’s the ROI on a commercial hat steamer?
At a typical $15 to $25 service charge per hat shape, even a $1,199 EVD-1 pays for itself within 50 to 80 hats. Most shops report recouping the investment within the first month or two of offering the service. Shaping also drives hat sales, as many customers won’t buy until they see their preferred crease on the hat.
Can I fix a crushed straw hat with steam?
Yes, with care. Straw is more fragile than felt. Apply steam sparingly, just enough to make the fibers flexible, then gently reshape by hand. Let it dry completely on a form. Commercial steamers with adjustable pressure or greater distance control make straw work more predictable.
Do I need ASME/UL certification on my steamer?
If you’re operating a pressurized boiler in a commercial setting, certification matters for insurance, inspection, and liability purposes. Hoffman’s Pro Line and industrial models carry both ASME and UL certification. Non-pressurized units like the GEM-III don’t require boiler permits, making them suitable for mall and retail environments where permitting may be restrictive.
Is it possible to over-steam a hat?
Absolutely. Over-steaming saturates the material, which can make it limp, shrink felt, or permanently damage the sizing that gives a brim its stiffness. Train operators to apply steam in short bursts and stop as soon as the material feels pliable. Commercial steamers producing drier steam reduce this risk compared to consumer equipment.
Can I steam a hat with leather or velvet trim?
Steam the felt or straw parts normally, but shield leather, suede, and velvet with a dry towel or foil. Direct steam on leather causes staining and stiffening. Steam on the face of velvet crushes the pile. Make this part of your operator training to avoid damaging customer hats.
How do I maintain my commercial steamer?
Regular descaling based on your water hardness is the most important maintenance task. Hoffman’s Workhorse plans automate consumable shipments so maintenance doesn’t slip through the cracks. All Hoffman equipment includes unlimited lifetime remote technical support, so troubleshooting is a phone call away.
What equipment does a hat shop need to get started?
At minimum: a commercial steamer, a steam wand or nozzle, hat shaping heads, a horsehair finishing brush, and a curing area with hat stands. Hoffman’s hat shop bundles ($2,149 to $4,895) include the steamer, wand, shaping heads, and accessories, so a new shop can be operational immediately without sourcing components separately.


